Showing posts with label fall. Show all posts

Sunday, November 11, 2007

One more thing to do with apples

I swear I've been trying to post for the last week. First real life ate me, and then blogger ate my post twice in one night, and I decided that was probably a sign that I should go study or something like that. Anyway.


I made this Apple Kuchen shortly after my last post, when we still had apples and were wondering what to do with them. And then I took the name to work and got one of my co-workers to teach me how to pronounce it.


The recipe itself I found on Baking Bites, a blog I have frequented ever since I discovered it via the ReadyMade blog. It was then called Bakingsheet, and the post that caught my eye was a recipe for homemade graham crackers, which were then supposed to be incorporated into homemade s'mores. I was still in my occasional-batch-of-cookies-and-brownies stage of cooking, so needless to say I never got around to either the crackers or the s'mores... but I still read the blog.


Origins aside, this is a nice, not-terribly-sweet cake that goes excellently with tea. I plan to omit the apples in an upcoming version and try it as a loaf cake - I'll let you know how it goes.

And a gratuitous kitty pictures never hurts - it's been too long.


Chuck has this thing for being cute in boxes - I can't help myself.

Monday, October 29, 2007

How d'you like them apples?


We liked them just fine. Liked them for two days and a whole galette, no less.


When we got home from the farmer's market, I had a bag full of apples and a mind full of pie... and then realized that I didn't really want to spend the entire afternoon peeling and coring and slicing. So I went with the slacker's version of apple pie: an apple galette, which combines beautifully flaky pie crust with a generous layer of apples, cinnamon and sugar. And it requires only one and a half good-sized apples, which means you can spend more time enjoying that rare clear blue sky and less time with your paring knife.

It is also the perfect excuse to get out your brand new pastry blender - which you bought specifically for this project. (Some good must come of working in a kitchenwares store).


Apple Galette
adapted from the Joy of Cooking

For the pastry:
1 1/4 cups all-purpose flour
1/2 teaspoon sugar
1/2 teaspoon salt
10 tablespoons (1 stick plus 2 tablespoons) cold unsalted butter, cut into 1/4 inch pieces
2-3 tablespoons ice water

For the fruit:
~1 1/2 large apples of your choice (I used pippin)
3 tablespoons unsalted butter, melted and then cooled to lukewarm
3 tablespoons sugar
~1/4 teaspoon cinnamon (I don't actually know how much I used - I have a heavy hand with cinnamon)

In a large mixing bowl, combine your flour, 1/2 teaspoon sugar and 1/2 teaspoon salt. Using a pastry blender, chop the butter into the flour mixture until it resembles breadcrumbs, with a few larger pea-sized pieces. Work quickly, so that the butter doesn't melt. Drizzle 2 tablespoons ice water over the flour mixture. At this point, I start using my hands to bring the dough together. If it's too dry, add another tablespoon of water, but be careful not to let it get too wet. Form the dough into a ball, flatten it into a thick disc, then wrap it in plastic wrap and put it in the refrigerator for about 30 minutes.

Preheat the oven to 425 degrees.

Use this time to prep the apples. Peel and core 2 apples, then slice them about 1/8 inch thick.


Take the dough out of the refrigerator, and, on a sheet of parchment paper, roll it into about an 11-inch round. Brush a thin layer of melted butter over the dough.

Leaving a 1-inch rim of dough bare, layer the apples in slightly overlapping concentric circles on the pastry.


Fold the border of the dough over the edge of the apples. Galette are supposed to be rustic and charming, so don't worry if it looks a little messy. Drizzle all but about 2 teaspoons of the remaining butter over the apples. In a little bowl, combine the 3 tablespoons sugar and as much cinnamon as looks good (1/4 teaspoon is a good starting point), and sprinkle over the apples.


Bake at 425 degrees for about 15 minutes, or until the pastry starts to colour. Then lower the temperatures to 350 degrees and bake for approximately another 25 minutes, until the pastry is golden brown and sounds hollow when you try to tap it and end up burning your fingers.

Pull the pan out of the oven, brush the apples with the last of the butter and let cool. Once it has cooled, transfer it to a plate (good luck with this - it's a bit tricky, since the pastry is so very crumbly). Your best bet is probably to transfer the galette with the parchment paper, and then slide the paper from underneath.


Serve with milk or tea - you'll need something, that's for sure.


And while it's best that first day, it will keep overnight if covered, and make a very tasty breakfast the next morning.


Saturday, October 27, 2007

Itadakimasu: Saturday Morning Edition

Matt and I finally managed to get a day off together - and a proper day off, with no class and no work and no real necessary errands. Instead of sleeping in though, I dragged him out into the sunlight at the brutal hour of 12 o'clock to catch this:


Our local farmer's market, on the Portland State Campus.

It was pretty jam-packed by the time we got there, due to the pumpkin carving something-or-other going on in one of the central booths.

Our first order of business was breakfast - Matt was in search of the breakfast burrito booth, which does a decent imitation of a New Mexican breakfast burrito, but they were nowhere to be found. We went with tamales, instead.


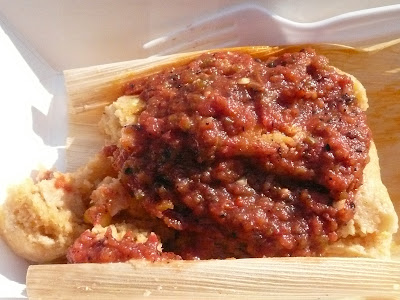
A Yucatan chicken tamale smothered in somewhat spicy salsa - not a bad way to start the morning. The man selling them was handing out warnings alongside.

"I only have hot left - is that all right?"

Oh, more than. Matt had his with lashings of sour cream - prettier than mine, but not nearly as tasty, though he may beg to differ.


We sat on the steps of the library while we ate, much to the chagrin of the students attempting to go study. But once fortified, it was time to properly explore the weekend's crops.


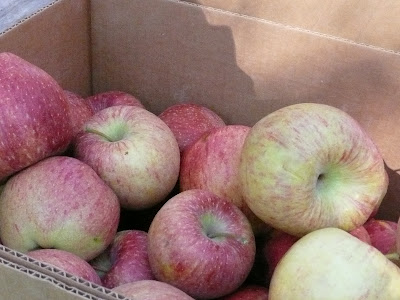
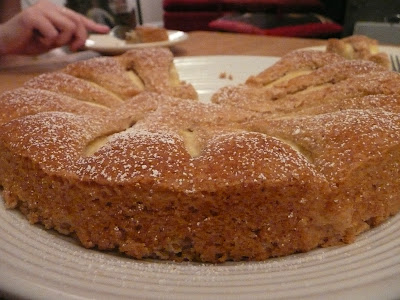
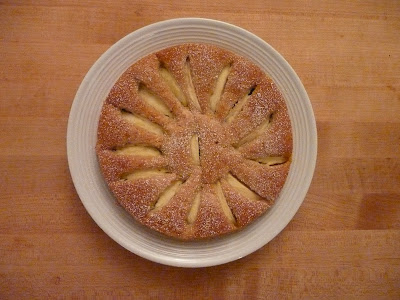
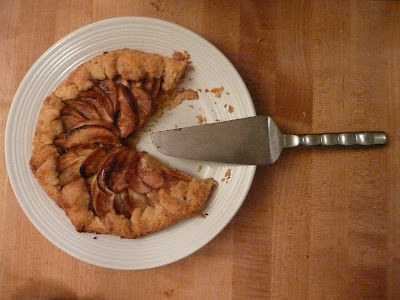
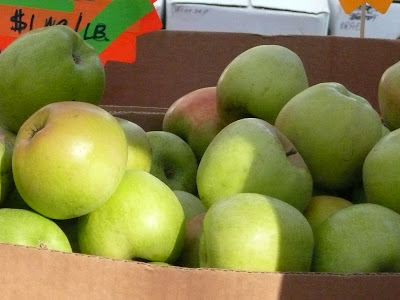
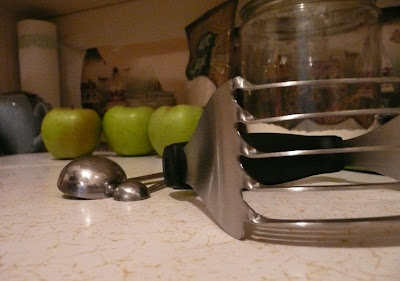
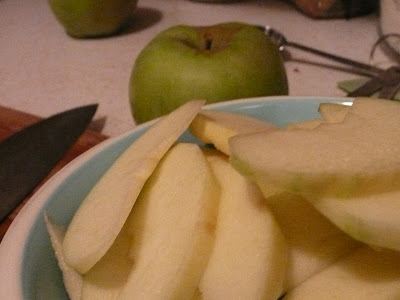
My favourite apple booth was somehow out of Honeycrisp apples - my current addiction. I hope the season's not over. I picked up some Pippin and Jonagold instead - it's a rough life. At another booth, I also found some fresh-pressed, unfiltered cider. I came home with half a gallon, all sweet and cloudy. I may dig out some cinnamon sticks and cloves later on, and make a batch of mulled cider, if any of it lasts that long.

Also, despite being so theoretically isolated from all things spicy and New Mexican out here in the great Northwest... there is a chile-roasting booth at the market.


The roaster they use is just like the one that sits outside of the little fruit market down on 4th street in Albuquerque, where my parents bought (literally) garbage bags full of green chile. I remember chile-peeling parties in the front yard, with everyone gathered around a little round table, their hands gloved, peeling and de-stemming the green chiles, stuffing them into little ziploc bags to be frozen and used, all winter long.


We bought these - the hottest they have - right out of the roaster. We don't have any gloves in the house, so whenever I peel chile I always end up sitting with my hands in a little bowl of milk later that evening. Matt laughs at me, but it's the only thing I've found that stops the stinging.

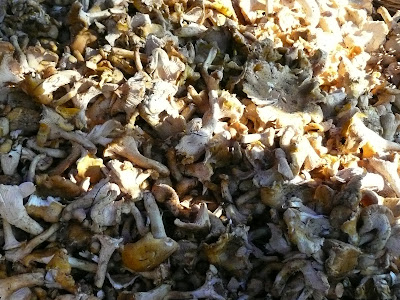
More in a Northwestern vein, my usual mushroom booth did not disappoint. Fighting my way through the crowd that always gathers, I found a veritable mountain of chantrelles.


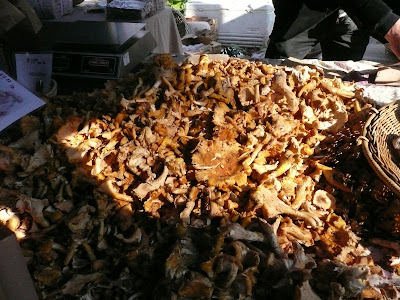
I took a hillock home with me.


Not all of those - just a few big handfuls. I haven't decided what to do with them yet: whether to incorporate them into something larger, or just saute them with a little butter and enjoy them on their own.

I also found myself taking absurd quantities of photos of various squash, something I neither eat nor cook, but am inexplicably drawn to.


Are these butternut? I feel compelled to call them butternut, because of the colour, but they could be spaghetti, for all I know. And these, what are these?


Besides amazing, I mean. I wish I liked squash - really, I do. I've tried. There's something about the texture, though, that I can't get past. It's mushy, no matter how it's cooked. And in soups, there's always a faintly powdery texture to it that I just can't get over. So I guess I'll just photograph them, for now.

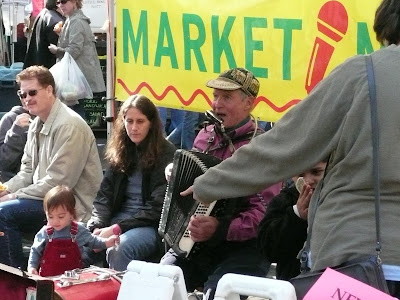
There are a few other inedibles, besides squash. The Accordian Man, for example, while neither food nor farmer, is always there. He's a favourite with kids - there are usually half a dozen dancing somewhere nearby.


While I was taking a last minute tour of the booths to see if I had missed anything important, Matt took the camera and headed for the balcony of the student union building, to see if he could get some decent aerial shots, or spot anything new.


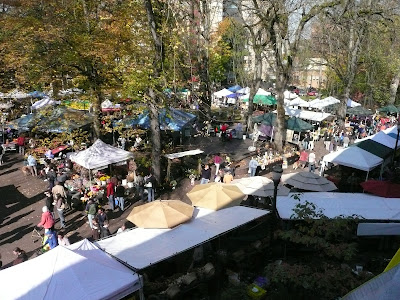
This picture gives you a decent idea of the scale of the market - it's decently-sized. Not overwhelming, and small enough to get quite crowded, but I had my choice of a fair multitude of different bakers, butchers, cheesemongers and orchards.

And florists - there can never be too many flowers at a farmer's market.


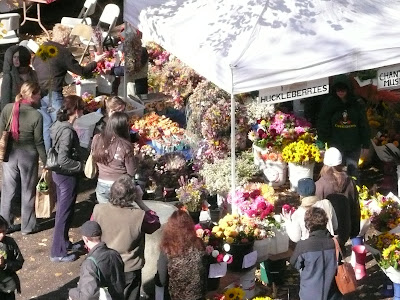
I tend not to bring them home, as I will put them in a vase, forget about them and find them brown and pathetic two months later. I do this with living plants as well, not just cut flowers. My parents' green thumbs passed me over, somehow. So for now, I just enjoy the pictures, and let someone who will remember to care for them take the flowers home.

Thursday, October 25, 2007

A few fall colours

I'll be the first to admit that I have mixed feelings about living in Portland - and that I get miserably homesick for little ol' Albuquerque. Laugh if you like - I was so desperate to leave Albuquerque for so long, and now I can't wait to go home for a visit over Christmas....

Don't get me wrong - Portland has its moments.


Like that one. We've had a spell of dry days, recently - relatively clear skies, the weather cool but not freezing, the leaves beautiful and my first actual day off since classes began coming up on Saturday!

Also, I have a lovely new pair of pink plaid rainboots on their way to me right now - to help keep me dry when the rain returns. (According to the widget on Dashboard, it should be rearing its drippy head on Saturday - how ironic).

But when new rainboots and fall foliage aren't enough to keep me and Matt trudging through the grey... I make salsa.


And we eat it by the bowlful. On this particular night, what you see was what we got - chips and salsa for dinner. There were no complaints.

As usual, I don't really have a proper recipe for it. I've watched my folks make it for years, and I've made a few changes here and there to make it my own. On this particular occasion, I made a large batch and we used the rest in burritos the second night. This recipe will make enough to serve a group of people as an appetizer, or two as a major meal with leftovers.

Salsa for the Homesick

6-8 small tomatoes (I used romas, because that was what I found that day. Substitute any tastier, juicier variety you can get your hands on, though)
1/2 a large red onion
1 large anaheim pepper, seeds scraped out (it's mostly for flavour, rather than spice, but you needn't be too scrupulous about your scraping - a few seeds never hurt anyone)
2 serrano peppers, one with seeds in, one with seeds scraped out (change this up to adjust the spiciness to your liking)
large handful cilantro
2 limes
2-3 tablespoons olive oil
salt to taste (plenty!)


Chop the tomatoes and red onion into small, fairly regular pieces, and toss into a large mixing bowl. You don't want to mush them up, but neither do you want to end up with huge pieces of tomato and onion on your tortilla chip. Open the anaheim pepper and scrap the seeds out before chopping the chile into very small pieces. Add to the tomatoes and onions in the bowl. Open one of the serranos, scrape the seeds out and mince finely, and then mince the second one - with the seeds still in. Add to mixing bowl.


At this point, you may want to stir to combine and see how your ratio of tomato to onion to chile looks. Add a little more of any of them if you like. Chop the cilantro and add to the bowl.

This is the point when I diverge from my dad's recipe. He adds a little lemon juice to his salsa. I'm more of a lime kind of girl.


Slice two limes in half, and using a reamer or the citrus juicing item of your choice, juice into the mixing bowl. Add a couple of tablespoons of olive oil, and plenty of salt.

Stir to combine, and taste. Adjust salt, lime, chile or olive oil to your liking. Taste again. The tasting process is crucial at this point in the salsa making.


And lastly, if you haven't already, break open the bag of tortilla chips and dig in. 

Tuesday, September 18, 2007

In preparation of the long dark cold heading our way

I admit it freely - I'm scared of the winter here in Portland. I come from a desert - I'm used to sunshine ALL the time. And while I don't like it, it's what I mostly expect.

Earlier this week, though, there was a sudden change in the weather here - it clouded over and got cold, and it's now officially fall. And I am taking full advantage of the change to start on the cold-weather culinary range, starting with this Beef, Mushroom and Caramelized Onion stew I made a couple of days ago.


I'm afraid that I have fewer photos around on this one - Matt was still at work when I got started, and I spaced having the camera on hand. I'm not used to this documenting cooking thing, yet!

The recipe itself is inspired by one I read in a book at work, but I didn't exactly follow it. I have developed my parents' habit of rarely measuring anything when I cook (I'm pretty scrupulous about it when I bake, though), so Matt finds it faintly frustrating to learn recipes from me. A simple "how much do I add?" always gets a not so simple answer: "I don't know - enough." So the measurements below are approximations. I find that stew is pretty much a DIY thing, anyway - you just add what you want, let it cook, and taste it on occasion to make sure nothing terrible has happened.

Beef Stew with Mushrooms, Onions and Red Wine

2lbs beef stew meat, cut into smallish pieces
2 medium onions, sliced thin
1/2 lb crimini mushrooms, quartered
1 tsp thyme, dried
1/2 tsp marjoram, dried
2 Tbsp. flour
1/2 bottle red wine
1 cup chicken/beef broth
salt
freshly ground black pepper

In a large cast iron frying pan/dutch oven over medium high heat, heat a little olive oil and add the beef. Brown it well, seasoning with salt and pepper as you go. I did mine in several batches - make sure you can keep the meat in a single layer. When all of it is browned, put it in a large bowl and set aside.

Add a little more butter to the pan and then put the onions in. Let them soften slightly, then lower the heat to low or medium, depending on your stove and how much time you have and let them cook until soft and brown. Remove from pan and reserve (use a separate bowl from the meat).

Bring the heat back up to medium-high, add the mushrooms to the pan and saute, adding the thyme, marjoram and plenty of salt and pepper as you go. You can also add a little more olive oil or butter if you need to. When the mushrooms are brown and juicy, return the onions to the pan and sprinkle the 2 tablespoons flour over and mix it in. This is something from the original recipe, but hey - it worked. You could also dredge the meat in flour before browning it, if you were so inclined. I was not.

This was the point in the cooking where things got complicated for me. My kitchen is still a work in progress, so I don't have a dutch oven yet. I know, I work at a kitchen store, but even with my discount a plain old cast iron 5 quart would set me back a pretty penny, and if I'm going to spend the money I want a red Le Creuset, thank you. So once the onions and mushrooms are done and combined and ready to go, I transferred them to a 4 quart Cuisinart saucepan. It's not ideal, but it works. Then I deglazed the frying pan with a bit of the red wine and poured it over.


I got the mixture started over medium-high heat again, then added the reserved beef and the accumulated juices, the half bottle of red wine, and about a cup of chicken broth. If you are fortunate enough to have a good-sized dutch oven in your life, you can skip all of these steps and simply return the beef to the same pan and add the wine and broth.

Let it come to a boil, then cover, reduce the heat to medium-low and let simmer for about 1 1/2 to 2 hours, or as long as you can stand before you eat.

I served this over egg noodles, a la my grandad's boeuf bourguinon, but you can also just have it in a bowl and use bread to sop up the remaining broth. You could also add potatoes and carrots and anything else that sparks your interest to the stew while it's cooking - this is kind of a base recipe for me - the beef and onions are the starting point, and I wanted very specific flavours and textures, so I kept it simple. The mushrooms were mainly just because mushrooms make everything better.

Good luck with your own version!

Gratuitous kitty picture - Chuck is glad it's fall, too.