Tuesday, September 18, 2007

What I did on my day off

Besides update once already, I mean.

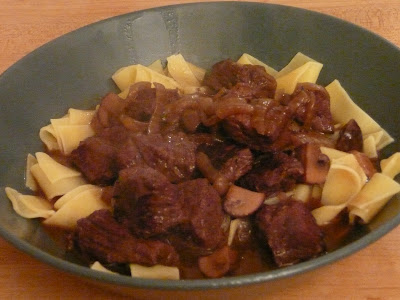
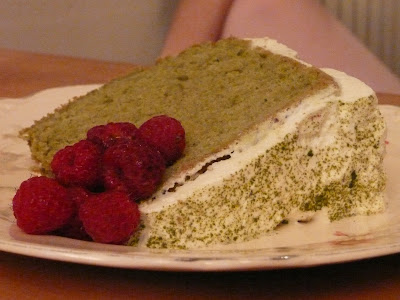
I spent the afternoon making these: Pate a choux aux framboises.


Aren't they pretty?

Of course, saying that I spent the afternoon doing this makes it sound terribly labour-intensive, and it was really very simple. I had brought home some end-of-the-season raspberries, and was poking around Chocolate and Zucchini when I found this recipe and was instantly inspired. (I am a huge fan of Clotilde's, as you will soon find out - I wish Powell's stocked her cookbook!)

I was too lazy to look up conversions for her recipe, and have yet to get a scale (see my bit about dutch ovens a little earlier today), so I turned to the Joy of Cooking for my recipe and ended up with kind of a mishmash of the two that goes something as follows.

Pate a choux.

Preheat oven to 400 degrees.

In a smallish saucepan, combine:
1/4 cup water
1/4 cup milk
4 Tbsp. (1/2 stick) unsalted butter, cut into little pieces
1 Tbsp. sugar
pinch of salt

Bring the mixture to a boil over medium-high heat, and when the bubbles start add all at once:
1/2 cup flour
Stir vigorously with a wooden spoon until the mixture pulls away from the sides of the pan and sticks to itself. It is a very distinctive look. Transfer to a bowl to cool a bit. It will look very unappetizing, but that's okay - it gets better.


After about five minutes, using the same spoon, beat in:
two eggs
Mix until smooth, then drop the dough in generous tablespoonfuls onto a layer of parchment paper on a cookie sheet. They will still look terrible. Do not be discouraged.


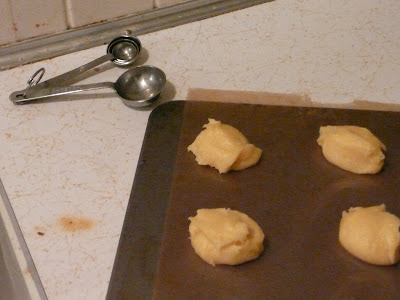
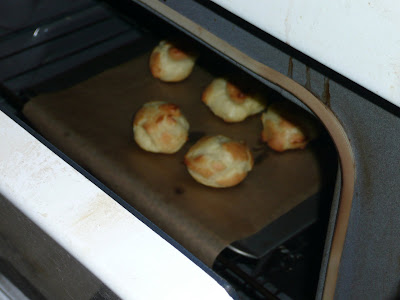
Bake at 400 degrees for 15 minutes, then lower the oven temperature to 350 and bake for another 10 minutes. There will be an amazing transformation during this time:


Now - turn the oven off and let them sit - still in the oven - for an additional 10 minutes. Then pull them out, peel them off of the parchment paper and transfer to the rack that you hopefully own (I don't - again, dutch oven schpeal) and let cool. If you can't resist it, go ahead and eat one now. Matt and I polished off a couple before they ever got filled.


Once they are cool, fill with whipped cream and raspberries (for this version) or anything else that sounds tasty and eat!

The entire experience was very reminiscent of Japan for me, again. In every train station you can find little kiosks selling "shu kurimu," or choux cream - Japanese cream puffs, which I swear are one of the tastiest things you will ever put in your mouth. But if there are no Japanese train stations nearby, give these a shot - they'll do in a pinch.

In preparation of the long dark cold heading our way

I admit it freely - I'm scared of the winter here in Portland. I come from a desert - I'm used to sunshine ALL the time. And while I don't like it, it's what I mostly expect.

Earlier this week, though, there was a sudden change in the weather here - it clouded over and got cold, and it's now officially fall. And I am taking full advantage of the change to start on the cold-weather culinary range, starting with this Beef, Mushroom and Caramelized Onion stew I made a couple of days ago.


I'm afraid that I have fewer photos around on this one - Matt was still at work when I got started, and I spaced having the camera on hand. I'm not used to this documenting cooking thing, yet!

The recipe itself is inspired by one I read in a book at work, but I didn't exactly follow it. I have developed my parents' habit of rarely measuring anything when I cook (I'm pretty scrupulous about it when I bake, though), so Matt finds it faintly frustrating to learn recipes from me. A simple "how much do I add?" always gets a not so simple answer: "I don't know - enough." So the measurements below are approximations. I find that stew is pretty much a DIY thing, anyway - you just add what you want, let it cook, and taste it on occasion to make sure nothing terrible has happened.

Beef Stew with Mushrooms, Onions and Red Wine

2lbs beef stew meat, cut into smallish pieces
2 medium onions, sliced thin
1/2 lb crimini mushrooms, quartered
1 tsp thyme, dried
1/2 tsp marjoram, dried
2 Tbsp. flour
1/2 bottle red wine
1 cup chicken/beef broth
salt
freshly ground black pepper

In a large cast iron frying pan/dutch oven over medium high heat, heat a little olive oil and add the beef. Brown it well, seasoning with salt and pepper as you go. I did mine in several batches - make sure you can keep the meat in a single layer. When all of it is browned, put it in a large bowl and set aside.

Add a little more butter to the pan and then put the onions in. Let them soften slightly, then lower the heat to low or medium, depending on your stove and how much time you have and let them cook until soft and brown. Remove from pan and reserve (use a separate bowl from the meat).

Bring the heat back up to medium-high, add the mushrooms to the pan and saute, adding the thyme, marjoram and plenty of salt and pepper as you go. You can also add a little more olive oil or butter if you need to. When the mushrooms are brown and juicy, return the onions to the pan and sprinkle the 2 tablespoons flour over and mix it in. This is something from the original recipe, but hey - it worked. You could also dredge the meat in flour before browning it, if you were so inclined. I was not.

This was the point in the cooking where things got complicated for me. My kitchen is still a work in progress, so I don't have a dutch oven yet. I know, I work at a kitchen store, but even with my discount a plain old cast iron 5 quart would set me back a pretty penny, and if I'm going to spend the money I want a red Le Creuset, thank you. So once the onions and mushrooms are done and combined and ready to go, I transferred them to a 4 quart Cuisinart saucepan. It's not ideal, but it works. Then I deglazed the frying pan with a bit of the red wine and poured it over.


I got the mixture started over medium-high heat again, then added the reserved beef and the accumulated juices, the half bottle of red wine, and about a cup of chicken broth. If you are fortunate enough to have a good-sized dutch oven in your life, you can skip all of these steps and simply return the beef to the same pan and add the wine and broth.

Let it come to a boil, then cover, reduce the heat to medium-low and let simmer for about 1 1/2 to 2 hours, or as long as you can stand before you eat.

I served this over egg noodles, a la my grandad's boeuf bourguinon, but you can also just have it in a bowl and use bread to sop up the remaining broth. You could also add potatoes and carrots and anything else that sparks your interest to the stew while it's cooking - this is kind of a base recipe for me - the beef and onions are the starting point, and I wanted very specific flavours and textures, so I kept it simple. The mushrooms were mainly just because mushrooms make everything better.

Good luck with your own version!

Gratuitous kitty picture - Chuck is glad it's fall, too.

Wednesday, September 12, 2007

Happy Birthday to me (and Itadakimasu)

It seems fitting that my first post here on Itadakimasu should feature my birthday cake, and photos of said cake taken with my birthday camera (thanks, Mom and Dad!)

So here it is: Matcha Chiffon with whipped cream and raspberries.


I've been craving matcha chiffon cake for a while now - since last summer, actually, when I was most recently in Japan. While it's not exactly a traditional Japanese sweet, it's always been one of my favourites, and I thought my birthday would be a good excuse to borrow my neighbour's tube pan and get to work on re-creating it.

And while eating it in our Portland apartment is not exactly the same as eating it at the Dotoro cafe overlooking Ginza san-chome, I can't really complain.


The recipe is a modified version of the classic Joy of Cooking Chiffon Cake recipe, and goes as follows.

Preheat oven to 325 degrees.

In a small bowl, pour 3/4 cup slightly-less-than-boiling water over about a teaspoon of matcha (green tea powder). Stir to combine, and let cool. This is not at all the proper way to make drinking matcha, but will do as a substitute for water in the cake recipe, to bring out the tea flavour.

Sift together twice:
2 cups cake flour
1 1/4 cups sugar
1/4 cup matcha (green tea powder)
1 tablespoon baking powder
1 teaspoon salt


In another bowl, combine:

5 egg yolks
matcha infusion (see above - should be about 3/4 cup liquid)
1/2 cup vegetable oil

Stir egg yolk/matcha mixture into the flour/matcha mixture. You will have a fairly unappetizing batter, at this point, but I promise, it gets better.

In another large bowl, beat until stiff peaks form:
8 egg whites
1/2 teaspoon cream of tartar

Gradually add 1/4 cup sugar.


Using the spatulate item of your choice (I use a nifty silicone spatula/spoon thing I got from work), fold one quarter of the egg whites into the matcha batter, and then fold in the rest of the egg whites. They don't need to be fully combined - you'll still see streaks of white.


Kind of like that, but less blurry in real life.

Scrape the batter into an ungreased 10-inch tube pan and spread evenly. Bake for 55-65 minutes, or until a toothpick comes out clean, and the top springs back when lightly pressed. My oven runs a little hot, so the cake was done after about 50 minutes.

When the cake is done, let it rest upside down over a bottle, or perched on four glasses - you know, usual faintly bizarre chiffon cake treatment - until cool, at least one and a half hours. When cool, run a thin-bladed knife around the edges of the cake to loosen it, and let it drop onto a serving platter or plate.


Frost with lightly sweetened whipped cream, and dust with matcha.


Matt was a fan of the raspberries on top of the cake, as well, and I found that they really made the green pop (and taste great, to boot!)


The finished product: