Wednesday, April 9, 2008

Nostalgia, with bread

I think we're almost there.... Sure, it was raining all afternoon, but it was sunny all morning, and the trees look like this:


Spring, right?

But the clearest sign is that last weekend was the first Farmer's Market of the season - I think winter is on its way out. I neglected to bring my camera along, but I'll try to at some point in the coming weeks, to explore the beginning of the Market, as opposed to the end.

Pickings were a little slim, yet: leeks and potatoes and radishes and rhubarb were the main players. (Despite their appearances at the grocery stores, asparagus and strawberries have yet to make their proper entrance).

I nearly missed the real prize, only catching it on our way towards the streetcar. I happened to glance over at the fish stall on the way by and spotted these, one of my absolute favourite things to eat in the entire world:


That's right. It's a clam.

I have something of a childhood fondness for clams. This might seem strange, what with my apparent ties to the desert and New Mexican food. But I was born in the Bay Area, and got my introduction to good food early on. There's a place in San Francisco, across the bay from where my family lived, called Tommaso's North Beach. I don't remember much about it - just a downstairs entrance and a somewhat cavernous dining room... but I remember eating clams with white wine and garlic and loving every single bite.


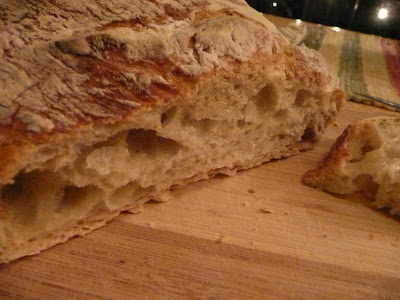
We loved every single bite of these, too. The sauce is basic - a fragrant broth of white wine, plenty of garlic and a sprinkling of chile flakes and a little lemon juice at the end. Don't bother with utensils - the clams are best right out of the shell - and make sure you have plenty of good bread on hand to soak up the juices. (You can wash your hands later - trust me, it's worth it).


Steamed Clams with White Wine and Garlic
inspired by Tommaso's North Beach, adapted from the Joy of Cooking

Serves 2, if you both like clams and this is the extent of your dinner.

First, a note on storing/cleaning clams: Whatever you do, make sure your clams can breathe! Put them in a bowl and cover them with a damp towel and store them in the fridge. An hour or two (or more, depending on how sandy they are) before you plan on cooking them, soak the clams in a bowl of cold water in the fridge to clean them. Drain before using. If their shells are very dirty, scrub them with a vegetable brush.

2 pounds hardshell clams
1 cup white wine
2 tablespoons olive oil
1 tablespoon minced garlic (a couple of large cloves)
a couple of generous pinches of chile flakes (enough for a tiny bite)
the leaves from a couple of sprigs of thyme (you could omit this, I had some on hand - didn't think it was especially noticeable, but I have this thing for adding thyme to anything and everything)
juice of 1/2 lemon
salt, freshly ground black pepper to taste
bread, for serving

Over medium heat, in a large, deep skillet, combine olive oil, garlic, chile flakes and thyme and cook, stirring occasionally, just until the garlic begins to colour. This will only take a few minutes. Add the clams and increase the heat to medium-high, stirring constantly, for about a minute. Add the wine, cover the skillet and cook, shaking the pan occasionally, until all (or most) of the clams have opened. (The heat you use may actually vary from stove to stove - my electric stove is terrible and treacherous and slow to change, so I usually stick closer to medium-high. High is a little scary.)

Using a slotted spoon and working quickly, scoop the clams out of the pan and into bowls. Turn the heat up to high and add the lemon juice, salt and freshly ground black pepper. Let the sauce boil for a few minutes and reduce slightly, then pour it over the clams.

Serve, with plenty of bread and napkins, and a bowl for the shells.

Tuesday, April 1, 2008

At long last

I've had it.

It's spring, right? So why is it 36 degrees and hailing daily? I'm talking drifts of hail, people, ankle-deep in the courtyard of our apartment building. (Perhaps I exaggerate about the ankle-deep, but not the rest of it - I promise!) In New Mexico, it's 70 and sunny, and all I know is that I'm ready for that here. I'm ready for summer, really, with the sun setting at nine, and the farmer's market over-flowing with berries and tomatoes and corn.... I hardly know what to cook these days, since everything I'm craving is still appallingly out of season.

But we still need dinner, and this has taken me far too long to post. I haven't be able to think of anything much to say about it - there was no story to it, per se, not necessarily any poetry. The process of creating and cooking this was simple, as was the reason for doing so: we were hungry. This is our main reason for eating, right? Followed closely, hopefully, usually, by pleasure. I had mushrooms, shallots, goat cheese and baking supplies on hand, and we're trying to be budget-conscious these days. So here is dinner, at long last.


Crepes with Mushrooms, Caramelized Shallots and Goat Cheese

I guess you could say that it is inspired by my favourite savoury crepe at Le Happy - caramelized onion and goat cheese - but I have yet to meet a dish that isn't improved by the addition of mushrooms. (I believe I illustrated my love of mushrooms pretty thoroughly with this post).

Serves two.

for the crepes:
1/4 cup all-purpose flour
1/4 cup milk
1/4 cup lukewarm water
1 large egg
1 tablespoon unsalted butter, melted
1/4 teaspoon salt

Combine all ingredients in a large bowl and blend with an immersion blender until smooth. Alternatively, use a full-sized blender or food processor.
Cover with plastic wrap and let stand for 30 minutes (or however long you need to prepare the filling).

for the filling:

8 ounces mushrooms
2 shallots
2 ounces (ish) goat cheese, at room temperature (whatever looks good, really - I didn't actually measure this)
olive oil/butter
thyme (fresh or dried, whatever you have on hand - fresh is better, dried is all I had at the time)
salt
freshly ground pepper

Chop the shallots finely. In a heavy-bottomed pan over medium-low heat, melt a little butter and olive oil together. Add shallots and cook until soft and brown. Remove from pan and set aside. Raise the heat to medium-high, and if necessary, melt a little more butter and oil in the pan. Add the mushrooms, saute until done and sprinkle with thyme, salt, and freshly ground pepper to taste. Reintroduce shallots to pan, then remove from heat and set aside.

In a crepe pan or a non-stick pan, melt a little butter over medium-high heat. Whisk the crepe batter to make sure it is smooth, then pour a couple of tablespoons' worth into the pan. This is your test crepe - once it is done, the pan should be right for the next ones. Let it cook until bubbling on top, and very lightly browned on the edges , then slide out of the pan. You can flip it, if you want to, but it's not at all necessary. Cook the remaining batter in this way, using about a 1/4 cup of batter per crepe - you should get two, with maybe a tiny bit leftover.


If the filling is cold, reheat it briefly. Put each crepe on a plate, top with half of the mushroom and shallot mixture, then crumble half of the goat cheese into each. Fold over, eat and enjoy.


Oh, and because it's been too long - a gratuitous kitty picture.


Cats in a red chair, and plenty of mushrooms and goat cheese - I guess life could be worse.

Monday, March 17, 2008

Recreating Japan

My friend Katie is heading for Japan in the next couple of months, and while I've warned her that I'm going to be sending a shopping list along with her, I'm having a hard time deciding what to put on it.

The problem I'm having is that most of what I want from Japan isn't the type of thing that you can put in a suitcase and carry around with you - it's less tangible than that. What I want is the feeling of being there, of walking down the streets, taking unexpected turns into tiny alleys and finding a half-forgotten shrine next to a Tokyo department store or pachinko parlor; the long, winding, steep cobbled roads up to the waterfall at Kiyomizu Dera in Kyoto; the late-night train rides home, watching reflections in the opposite window of the half-empty car; learning to doze standing upright in the morning rush hour crush of passengers and not missing your stop. I want the festivals - I want the language - I want the unmarked streets and semi-incomprehensible signs - the frustration of not being able to read completely, the satisfaction when I recognize the occasional kanji.

I also miss the food, but luckily that's something I can usually recreate at home - like okonomiyaki.


Okonomiyaki is usually described as a "Japanese stuffed pancake," which isn't right at all. That said, I don't really know what is right. It is pancake shaped, yes, and fried on a griddle or in a pan. There is a batter, made with dashi or water, flour, yama-imo (mountain yam) and egg, then mixed with shredded cabbage, green onion, benishoga (pickled ginger), and the meat/seafood of your choice. In some districts they add noodles - but that's not the style in Nagoya, where I used to live. And then there is the sauce - sort of a Japanese barbecue sauce - and Japanese mayonnaise (totally different than American mayonnaise). Suffice to say, it sounds odd, looks a little odd, and tastes fantastic. And except for the benishoga and Japanese mayonnaise (which you should be able to find at your nearest asian/Japanese grocery), everything is pretty easy to come by.

Okonomiyaki
adapted from Hiroko Shimbo

for the sauce:
1/2 cup tomato ketchup
3 tablespoons Worcestershire sauce
1/2 teaspoon smooth French-style mustard
1/4 cup mirin
2 tablespoons sugar
2 teaspoons shoyu (soy sauce)

for okonomiyaki:
1 cup flour
1 cup water or dashi
1/2 teaspoon salt
3 tablespoons grated yama-imo (you can use potato starch in a pinch, or skip it altogether in an even pinchier pinch)
4 ounces green cabbage, shredded
1/4 cup green onions, sliced into rounds (I use the white and the lighter green parts)
2 tablespoons minced benishoga (note - this is red pickled ginger, not the kind you get with sushi!)
4 ounces beef sirloin, cut into thin strips
6-8 large-ish shrimp, shelled, deveined and sliced in half lengthwise
2 eggs
vegetable or canola oil

To make the sauce:

In a small saucepan, combine all ingredients. Bring to a boil and cook over low heat for 3 minutes. Remove from heat and set aside. Serve warm, or at room temperature (I prefer mine warmish).

To make the okonomiyaki:

First off, here is a dashi recipe. You can definitely skip the dashi and just use water, but if you have the time/energy, I definitely recommend dashi.

Sift flour into a bowl, add the dashi (or water), salt and grated yama-imo (or potato starch), and stir to mix. Divide the batter between two bowls, and put half of the cabbage, green onions, benishoga, beef and shrimp into each bowl. Add one egg to each bowl, and mix to combine.

Over medium-high heat, in a large skillet or on a griddle, heat enough vegetable oil to coat the bottom of the pan. When it is hot, pour the batter from one bowl into the skillet and spread the batter into a disk about 8 inches in diameter. Leave yourself a little room on either side to fit spatulas in later. Lower heat to medium and cook until the bottom is golden.

Then comes flipping, the most difficult part of okonomiyaki. You have a fairly loose, large pancake-like object in the pan, about eight inches across and perhaps three-quarters of an inch thick. To flip it, you'll need two spatulas, wrist strength, and nerves of steel: as such, Matt is the official okonomiyaki-flipper in our house.

First goes one spatula.

Then a second spatula.

Take a deep breath, lift, and commit - that's the key. You can't be afraid of the okonomiyaki during the flipping, or it will fall apart on you. (I've found the same is true of flipping fried eggs - the yolk always knows I'm scared, and it takes advantage of that and breaks.)


If it falls apart terribly, scoot the pieces back together and soldier on - it'll still taste good. Cook until the other side is golden and the middle is set (ish).


Divide into quarters and plate, topping with plenty of sauce and mayonnaise. (We didn't have the right kind of mayonnaise, so we just ate it with the sauce - also very okay!)

If necessary, heat a little more oil in the pan before adding the second bowl of batter - let this one cook while you eat the first one. They make decent leftovers, too, if you're full after round one.

Oh, and start saving for your next trip to Japan.

Tuesday, March 11, 2008

Again and again and again...

I usually go for variety when it comes to food. I mean, sure, I have favourites, comfort food, and a dishes that I turn to when otherwise uninspired. Every cook needs some sort of standard repertoire. But I feel somehow dissatisfied if a week's gone by and I haven't tried something new. I am definitely a creature of habit and of routine... but that routine must include something new.

The dish that I want to tell you about today defies everything I just said about variation. I could eat it for days on end, and usually do. It's something my mom made when Matt and I were back in Albuquerque over Christmas break. I ate it almost obsessively while we were there, and started recreating it the moment we got home. I've been meaning to photograph it and write down some sort of recipe or guideline ever since, but I "forgot" every time... which meant, of course, that I had the perfect excuse to make it all over.

Perhaps a week ago, I finally got my act together, took notes in the kitchen, and found my camera before we sat down to eat. These are the results:


Braised Pork with Fruit and Jalapeno-Lime Salsa
adapted from my parents

The amounts for this are very approximate (I don't think I've made it the same way twice). Play around with the quantities and see how you like it best.

2 - 2 1/2 lbs pork, cut into 3-inch-ish chunks
4 large-ish cloves garlic, chopped (somewhere around the 3 tablespoon mark?)
1 medium-sized yellow onion, diced
1/2 large apple, cored, peeled and chopped
1 orange, with peel, sliced into rounds (discard the end slices)
14 oz. can diced tomatoes with juice
1 chipotle chile from a can, finely chopped
1/2 - 3/4 cup chicken broth
canola oil
salt and freshly ground pepper to taste

Preheat oven to 375 degrees.

Over medium-high heat, in a large dutch oven, heat a layer of oil. Add as much of the pork as will fit easily in a single layer on the bottom of the pan and brown on all sides. Repeat with remaining pork. Set aside, then add onion to the pan and saute until translucent and soft. Add garlic and saute until fragrant, but not brown. Add about 1/4 cup of the chicken broth to deglaze pan, then remove from heat. Reintroduce pork and any juices that have collected. Add apple, orange, tomatoes, chipotle, and as much chicken broth as needed to come about halfway up the pork mixture. Add salt and freshly ground pepper, but be gentle at this point - you can always add more later.

Cover, and bake in oven for at least three hours - four is better - or until the apple, tomato and orange pulp have melted together, and the pork is very tender. Stir every 30 minutes or so. After the first two hours, you may want to remove the oranges to separate the pulp and the zest, discarding the zest and adding the pulp back to the mixture. Alternatively, let it cook for long enough and the zest will melt into the dish as a whole. After three hours or so, take the pork out and shred it, then put it back into the oven. Taste, and adjust for salt. By the time it's done, it should practically melt in your mouth, and most of the liquid should have been absorbed - it shouldn't be at all soupy. If it is, let it cook for longer.

Serve with Jalapeno-Lime Salsa (recipe follows) and warm corn tortillas.


Jalapeno-Lime Salsa

1/2 red onion, diced
2 jalapenos (or serranos), de-seeded (optional - depends on how spicy you like it - too spicy and the pork will be overwhelmed) and finely chopped
large handful cilantro, chopped
juice of 2 limes
salt

Combine red onion, jalapenos, cilantro and lime juice in a bowl. Taste and adjust for salt.


The salsa will survive for a couple of days in the fridge - it's best fresh. The pork, however, does very well as leftovers - and will last you until you buy the ingredients to start all over again.

Tuesday, March 4, 2008

On a well-caffeinated note...

Matt has joined the blogging realm and started Dark Coffee, a coffee blog. He'll be writing about his experience as a barista and sharing some of what he's learning about espresso.

Most enticingly, perhaps, he'll be posting weekly latte art photos - go take a look.

Monday, March 3, 2008

A temperamental beast

I'm jonesing for summertime.

Yes, I profess to love rain, and yes, fall is my favourite season, and yes, I did whine all last summer that it was too hot, that it was too humid, that I couldn't wait for it to be over. But now I'm sorry, really I am, and all I can think about is tomato season, and berry season, and the farmer's market, and oh god sunshine. We got a little taste of spring this past week or so - it was beautiful and sunny and I carried my camera everywhere with me and never took any photos - at least not of the great outdoors.

I took photos of cake, though.


If ever my family had a cake recipe, it's this one: Orange Chiffon Cake with Lemon Glaze. My mom taught me how to make it, and my dad rhapsodizes about his mother buying them from the bakery truck when he was a child. It makes for a good transitional recipe, too: flavoured with citrus, which is readily available in the winter, but somehow summery tasting. The cake recipe itself is from the Joy of Cooking, though the glaze varies from season to season and lemon to lemon. And I don't know how chiffon cakes got such a reputation as terrifying and temperamental beasts - be nice to your egg whites and you'll get along fine. (Of course, I can be as smug as I like about that down here at sea level - in New Mexico it was a slightly different story).


Orange Chiffon Cake with Lemon Glaze
from the Joy of Cooking

For the cake:

Preheat the oven to 325 degrees. Have ready 1 ungreased 10-inch tube pan with a removable bottom, and make sure the ingredients are at room temperature, 68-70 degrees.

Sift together twice into a large bowl:
2 1/4 cups sifted cake flour (I used all purpose and it worked out fine)
1 1/4 cups sugar
1 tablespoon baking powder
1 teaspoon salt

In another bowl, beat on high speed until smooth:
5 large egg yolks
3/4 cup orange juice
1/2 cup vegetable oil
2 tablespoons grated orange zest
1 teaspoon vanilla

Stir into the flour mixture until smooth.

In another large bowl, beat on medium speed until soft peaks form:
8 large egg whites
1/2 teaspoon cream of tartar

Gradually add, beating on high speed:
1/4 cup sugar

Beat until peaks are stiff, but not dry. Use a rubber or silicone spatula to fold one-quarter of the egg whites into the egg yolk mixture, then fold in the remaining whites. Scrape the batter into the pan and spread evenly. Bake until the top springs back when lightly pressed and a toothpick inserted into the center comes out clean, 55 to 65 minutes. Let cool upside down for at least 1 1/2 hours, setting the tube over a bottleneck, or resting the pan on 4 glasses.

To unmold the cake, slide a thin-bladed knife around the cake to detach it from the pan, and lift out of the pan by pulling on the tube (this is why you want the removable bottom!) Then cut around the tube and the base of the cake and invert onto a plate. When you're cutting, be sure to press the blade of the knife against the pan, to avoid tearing the cake.

For the glaze (approximately):

2/3 cup lemon juice (juice of 2-3 lemons)
1/4 cup-ish powdered sugar

Stir powdered sugar to taste into lemon juice to dissolve. I like just enough to take the edge of sour off, but still keep a bit of pucker.

To glaze the cake, brush or spoon the glaze over the top of the cake, being sure to get the corners and let it run down the sides. Allow a couple of hours before serving to let it soak in a bit.


Sunday, February 17, 2008

Chocolate for (not really) Cynics

I've never been one for Valentine's Day.

Don't get me wrong - I'm not really a cynic. I'm a huge fan of love and the expression thereof, but why only be romantic one day a year? Why fight other couples for jewelry and flowers and tables at over-booked restaurants?

But I'm not here to expound on the foolishness of the holiday. It is one thing, and that's a great excuse for chocolate.


I used my chocolate excuse to make these Molten Chocolate Raspberry Cakes (along with half of the other food bloggers in the world), and while they're not terrifically attractive little desserts, they are pretty terrifically tasty.

They are very rich and truly chocolatey, so if you're not a chocolate fan (god help you), these probably won't be your thing. But hopefully you are, so that you can enjoy these, and we can stay friends. Make sure, when you make these, that you use chocolate that you enjoy eating on its own. I went with one of my Trader Joe's usuals: the Ocumare 71% from Venezuela. It comes in a 2.8 ounce bar, and while the original recipe, once divided, only called for about 2.3 ounces, I just threw the whole bar in. No regrets on that front. I do think, though, that they could have been smaller. I made a third of a recipe, because dividing it into quarters involved dividing egg yolks, and that was not something I was prepared to do. I made two of them in 6-ounce ramekins, and I think that three in 4-ounce might have been a better call, except that we might have ended up fighting over the last one, and that's not really what you're looking for on Valentine's Day.


Molten Chocolate Raspberry Cakes
Adapted from Epicurious

for the cake:
1 T. & 2 tsp. sugar
2.3 ounces (or 2.8) bittersweet chocolate, preferably 70% or more
4 T. butter
1 egg
1 egg yolk
1 tsp. flour

for the raspberries:
fresh or frozen raspberries (I used about 4 ounces frozen, because it was what I had on hand - experiment!)
sugar to taste (or none!)

for the raspberries:
If you have fresh, more power to you - I would suggest using them as is. With frozen, I simply warmed them in a small saucepan over low heat until they melted a bit, and added a little sugar. Reheat slightly before pouring over the cakes at serving time.

for the cake:
Preheat oven to 425 degrees, and generously butter and sugar the insides of two 6-ounce ramekins (or three 4-ounce).

Stir chocolate and butter in heavy small saucepan over low heat until smooth. Remove from heat.

In a large bowl, with an electric mixer, beat egg, egg yolk and sugar until thick and pale yellow, about 8 minutes. Fold 1/3 of warm chocolate mixture into egg yolk mixture (making sure it's not too warm), then fold in remaining chocolate. Fold in flour, and a few raspberries from the raspberry mixture, if you like. Divide batter between two (or three) ramekins.

Place ramekins on baking sheet. Bake until edges are puffed and slightly cracked, but center is still a little trembly, about 13 - 15 minutes.

To serve, unmold cakes onto small plates and top with raspberry mixture and softly whipped, (very) lightly sweetened whipped cream.


They won't be pretty, but you'll eat them anyway, and it will be so completely worth it.

Wednesday, February 13, 2008

Out of excuses

So the graduate school application is in, I'm more or less settled into the new job (I hope!) and anonymous readers are telling me to update.

I guess I owe you all some doughnuts, don't I?


Please excuse the lighting on the photos - it was fairly late at night when we began, and by the end of the process, we were far more interested in eating doughnuts than in photographing them.

Originally, my friend Katie and I hatched a plan for a doughnut brunch - which then became a midnight doughnut party - which then became an eight p.m. "hey, I have ingredients and a brand-new doughnut-cutter, do you want to bring your deep fryer over and make doughnuts?" sort of event.


There's something vaguely magical about deep-frying: the way the pale, flat rings of dough puffed and browned and floated to the top of the bubbling oil. We drained them on paper towels until they were only just cool enough to handle, and then we broke them into pieces and dipped them into cinnamon sugar and stuffed ourselves to the brim (and I'm not usually a doughnut person!) We even delivered one to the upstairs neighbour, (also a co-worker), who later pronounced them delicious and demanded that we bring a batch into work.

Well, we never got around to making another batch, but I have finally gotten around to sharing the recipe. So arm yourself with a deep fryer, several quarts of oil, tongs, plenty of cinnamon sugar, friends and a bottle of red wine - you'll find it's well worth it.


Sour Cream Doughnuts with Cinnamon Sugar
adapted from Epicurious

3 1/2 cups all-purpose flour
1 tablespoon baking powder
1 teaspoon ground cinnamon
1 teaspoon salt
1/2 teaspoon baking soda
1 cup sugar
2 large eggs
1/2 teaspoon vanilla extract
1/3 cup melted unsalted butter, cooled briefly
1 cup sour cream

Canola oil (for deep frying)
additional sugar and cinnamon to dip the doughnuts in

Whisk together flour, baking powder, cinnamon, salt and baking soda in a medium bowl. In a large bowl, using an electric mixer, beat sugar and eggs until very thick, about 3 minutes. Add vanilla, and keep mixing. Gradually beat in melted butter, and then add the sour cream in 2 additions. Gently fold in dry ingredients in 4 additions. The dough will still be very sticky. Cover and set aside for 1 hour. (Hopefully you'll remember to do this before your friends come over. If you're like me, and you don't, you can use that hour to go and get said bottle of wine).

Sprinkle two baking sheets lightly with flour. Divide dough into three portions. On a floured surface, press one third of dough out to 1/2- to 2/3-inch thickness. Cut with doughnut cutter, reserving scrapes and placing doughnuts and holes on floured baking sheets. Repeat with remaining two thirds of dough, pressing and recutting scraps until everything has been used.

Line two plates with several thicknesses of paper towels. Heat deep-fryer (or oil in deep, heavy skillet) to 365 to 370 degrees. Fry doughnut holes in two batches until puffed and golden-brown, turning once, about 2 minutes each side. Using slotted spoon, transfer doughnut holes to paper towels and let drain. Fry doughnuts in batches of about 3, depending on how many fit without crowding. They will take a couple minutes per side. Using a slotted spoon, transfer to paper towels and let drain. Dip in cinnamon sugar and eat as soon as humanly possible. The original recipe says to let them cool before doing anything, but who, may I ask, is going to look at a doughnut for that long?

Not anyone in my kitchen.

Monday, January 28, 2008

On another non-food note

If you look over to your right, below the recipe index, you may see that Itadakimasu now has a mailing list. Join, and I will send you an email every time I post a new recipe.

Tell me that's not a tempting offer.

Bread, legitimately

I am a neglectful blogger.

I don't mean to be, and I have a good excuse - several of them, actually. My application for graduate school is going in on Thursday, and I start a new job tomorrow, so I've been somewhat distracted as of late. But while life may conspire to keep me away from my camera and computer, I'm still in the kitchen.

And the bread has been turning out awfully well, lately.


It looks pretty legitimate, doesn't it?

Unfortunately, I can't take much credit. This is the infamous No-Knead Bread of Minimalist and Jim Lahey fame, and I am just one of many bloggers to extoll the method's virtues.

Unfortunately, with a statement of intent awaiting my attentions, I am going to leave you with the recipe and return to my regularly scheduled essay-writing.


No-Knead Bread
Adapted from the New York Times, The Minimalist and Jim Lahey

3 cups all-purpose or bread flour, more for dusting
1/4 teaspoon instant yeast
1 1/4 teaspoons salt
1 1/2 cups water
Cornmeal or wheat bran as needed

1. In a large bowl combine flour, yeast and salt. Add 1 1/2 cups water, and stir until blended; dough will be shaggy and sticky. Cover bowl with plastic wrap. Let dough rest at least 12 hours, preferably about 18, at warm room temperature, about 70 degrees.

2. Dough is ready when its surface is dotted with bubbles. Lightly flour a work surface and place dough on it; sprinkle it with a little more flour and fold it over on itself once or twice. Cover loosely with plastic wrap and let rest about 15 minutes.

3. Using just enough flour to keep dough from sticking to work surface or to your fingers, gently and quickly shape dough into a ball. Generously coat a cotton towel (not terry cloth) with flour, wheat bran or cornmeal; put dough seam side down on towel and dust with more flour, bran or cornmeal. Cover with another cotton towel and let rise for about 2 hours. When it is ready, dough will be more than double in size and will not readily spring back when poked with a finger.

4. At least a half-hour before dough is ready, heat oven to 450 degrees. Put a 6- to 8-quart heavy covered pot (cast iron, enamel, Pyrex or ceramic) in oven as it heats. When dough is ready, carefully remove pot from oven. Slide your hand under towel and turn dough over into pot, seam side up; it may look like a mess, but that is O.K. Shake pan once or twice if dough is unevenly distributed; it will straighten out as it bakes. Cover with lid and bake 30 minutes, then remove lid and bake another 15 to 30 minutes, until loaf is beautifully browned. Cool on a rack.


I promise it won't be so long next time... and there will be doughnuts when I return. (Real, live, home-fried doughnuts - really.) For the moment, though, enjoy your bread.

Wednesday, January 9, 2008

Further adventures in Creampuffland

I really don't know what's gotten into me with the cream puffs since I started writing Itadakimasu. I had never made them before, but I tried them once, and it was all over. Pate a choux in any form has become my go-to dinner party dessert - and once I found pearl sugar, chouquettes became my new obsession.

But that's for another day. I just stopped in tonight to post a recipe for these:


Pretty, isn't it? I got the original recipe out of Alice Medrich's
Chocolate Holidays (another Christmas present). Her version is for cream puffs filled with chocolate rum custard, stacked into a loose (short) croquembouche and topped with caramel glaze and spun sugar. I simplified it (and substituted a liqueur more to my taste) and ended up with these:

Chocolate Grand Marnier Cream Puffs with Candied Violets
adapted from Alice Medrich

For the cream puffs:
double recipe
pate a choux

For the chocolate Grand Marnier custard:
6 ounces bittersweet or semisweet chocolate, finely chopped
2 teaspoons vanilla extract
3 tablespoons Grand Marnier (or rum, or amaretto, or whatever you like)
4 1/2 tablespoons sugar
2 tablespoons all-purpose flour
2 tablespoons cornstarch
4 egg yolks
1 1/2 cups milk

Place the chocolate, vanilla and Grand Marnier in a medium bowl. Set aside.

In another medium bowl, combine the sugar, flour and cornstarch. Add the egg yolks and whisk until the mixture is pale and thick. Set side.

Heat the milk in a small saucepan until it forms a skin. Pour the hot milk gradually over the yolk mixture, whisking constantly until all of the milk is added. (Go slowly at first! You don't want to scramble the eggs.) Return the mixture to the saucepan and cook on medium heat (err on the side of low), stirring constantly. Alice Medrich suggests a wire whisk - I used a wooden spoon as well, to better reach the corners of the pan. Stir until the custard thickens considerably, then continue to cook and stir for another couple minutes. It should have kind of a runny pudding-like texture. Scrape the custard into the bowl with the chocolate. Stir until the chocolate is melted and completely combined with the custard. Cover the surface of the custard with plastic wrap and refrigerate until needed. It will keep in the fridge for up to 3 days, though I found it easier to work with (filling-wise) once it had warmed up a tiny bit.

Once your cream puffs have cooled, split them, fill them with the custard. To decorate them, I melted a little chocolate with some cream to make a sort of ganache and drizzled it over the cream puffs before topping them with candied violets.


And yes, the candied violets are utterly unnecessary, but aren't they pretty? I couldn't stand it, I had to use them.

Oh, and nothing to do with cream puffs - I'm attempting the (in)famous no-knead bread recipe tomorrow, so keep an eye out for the results!

Monday, January 7, 2008

Worth the extra work

Well, Portland has certainly welcomed us back in what I understand is true Northwest style: rain everyday since we returned on New Year's Day. We saw the sun for the first time since our vacation today. Not to sound ungrateful - it's lovely to be back. I missed our cats and our tiny, overheated apartment and the low, grey skies - the light in New Mexico is so terribly bright, so very clear. I've gotten used to the mellower richness of colours here, and gotten used to the greenery. I expect trees, now, and am no longer surprised by them. Albuquerque was so much flatter, and so much browner than I remembered it being.

That said, we sure managed to eat well while Matt and I were in town.

We had a host of places to visit, and even managed to fit in an extra visit to our beloved old
Frontier Restaurant (and reminisce about snow days and post-concert late night sweet rolls and breakfast burritos).

But I'm not here to rub green chile in anyone's face. I'm here to talk about some of the food we managed to turn out in my parents' kitchen: specifically New Year's Eve Dinner, here rather dramatically lit:


I'm afraid that the vast majority of our photos turned out this way - I could never be bothered to turn on any lights in the dining room to take proper shots. Now I'm paying for it.

The menu was largely from the
Zuni Cafe Cookbook (a most welcome Christmas present - Judy Rodgers is my new hero), with a dessert inspired by a recipe of Alice Medrich's. Remember those chocolate cookies awhile back? Same creator.

But dinner was as follows:
Mock Porchetta (or Tuscan Roast Pork) with roasted vegetables (fennel, onion, celeriac, parsnip, whathaveyou)
Savoury Apple Charlotte
Cream Puffs with Chocolate Grand Marnier Custard and Candied Violets

Altogether, the meal was three days in the making, and it was so utterly worth it. The pork and vegetables were lovely - delightful, in fact - an excellent roast. But the real scene-stealers were the Apple Charlotte and the Cream Puffs, which was in some ways quite gratifying, as they were, respectively, the most difficult and the easiest components. (Frustrating because now I know I'm going to have to make that Charlotte at least once a year, and god is it a nightmare. Such a tasty nightmare though, and so pretty on the plate.)

It begins, as many things do here at Itadakimasu, with apples.


Specifically, four pounds of braeburn apples, that my mother and I peeled, cored and sliced, draped with slivers of butter and roasted until they were tender and caramelized, and the mashed into a rough apple sauce.


The next day, we cut out templates from pieces of paper, sliced bread into half-width slices and a multitude of shapes to create bread linings in 6-ounce ramekins. Think a jigsaw puzzle, with crumbly cracked-wheat and walnut breads. I was tearing my hair by the end of it.


We then filled them with the apple sauce, buttered them further, and baked them until they were crisp and golden on the outside.


And then we ate them, which was probably a bad idea - because the combination of the crisp, buttery bread and the warm, sweet-but-not-too-sweet applesauce made the entire process seem very worthwhile, and entirely doable.

If you have the time and inclination to try this, you will not be disappointed. Honestly, these could go with a much simpler meat - they somewhat overshadowed the roast. More honestly, I would eat them on their own and be a very happy camper.

Roasted Applesauce & Savoury Apple Charlotte
from The Zuni Cafe Cookbook, by Judy Rodgers

For about 3 cups of applesauce:

3 1/2 - 4 pounds apples (use eating apples - Braeburns were fine, I would have preferred Pippins, because they're one of my favourites, but we were working with what we could find)
Pinch of salt
Up to 2 teaspoons sugar, as needed (I didn't use any - the apples were quite sweet on their own)
About 2 tablespoons unsalted butter
A splash of cider vinegar (highly recommended!)

Preheat the oven to 375 degrees.

Peel, core and quarter the apples. Toss with a little salt and, unless they are very sweet, a bit of sugar to taste. Spread in a shallow baking dish that crowds the apples in a single layer. Drape with slivers of butter, cover tightly and bake until the apples start to soften, 15 to 30 minutes.

Uncover, raise the heat to 500 degrees, and return the pan to the oven. Leave the apples to dry out and colour slighly, about 10 minutes. (A confession - we neglected to raise the temperature, so our apples got a much longer, slower roast - and were lovely, nonetheless. They were in the oven for nearer an hour, if I remember correctly.)

When the tips of the apples have become golden and the fruit is tender, scrape them into a bowl and stir into a chunky mash. Season with salt and sugar to taste, then consider a splash of apple cider vinegar to brighten the taste. (Yes!)

For the Charlotte, 4 servings:

4 six-ounce ramekins or custard cups

A chunk of day-old, chewy, peasant-style bread (make sure you have plenty of extra to get the right shapes!)
About 2-3 tablespoons unsalted butter, melted (err on the side of 3-4 tablespoons)
About 1 1/3 cups Roasted Applesauce (again, err on the side of more)

Preheat the oven to 350 degrees.

Slice the bread 1/8 inch thick. Avoiding the crust, cut 8 circles sized to fit the bottom of your ramekins, then cut 4 long rectangles to line the sides.(Judy Rodgers suggested partially freezing it, and I second this! Also, don't worry if you can't get whole pieces to create the shell of the charlotte - they piece together quite nicely.)

Brush the bread evenly, on one side only, with the melted butter. Line the ramekins with the bread, pressing the buttered  faces against the dishes. Set the 4 extra circles aside. Fill each ramekin with the roasted applesauce. Set the remaining bread circles, buttered side up, on top and press down lightly.

Bake until golden brown on top, about 30 minutes. To serve, slide a knife around the edge of each charlotte, then turn out onto warm plates. If the bottom circles stick to the dish, retrieve them by sliding a fork under the edges. (This wasn't an issue at all - yay for butter!)

Eat, and savour, knowing that you probably won't have these again for quite awhile, because you have to forget all about the paper templates and the partially-frozen bread before you could possibly convince yourself to go through it all again.

And don't worry, I won't make you wait too long for those cream puffs.

Saturday, January 5, 2008

Saying Goodbye


Zoe ?, 1992 - 5th January, 2008

I heard from my parents today - Zoe, one of our two dogs, passed away today, and they buried her under a cottonwood tree in the back acre.

She was an amazing animal: sweet and beautiful and absurdly charismatic, and she had a way of looking at you as though you were the most important person in the entire world, as long as you were petting her. She was the scourge of the wild chickens and guinea hens that roamed my parents' property, and could leap 5 foot fences without thinking twice. She came to us when she was a year old, with the unfortunate name of "Enya," and was almost mute for the first month. When she found her voice, she had a delightful - and occasionally frustrating - habit of "talking" with an odd, semi-howl whenever you told her something she didn't want to hear. When we adopted Cedar, a few years later, she became her surrogate mother, and never minded Cedar's ineffectual attempts to herd her around the house.

I could reminisce for pages - I won't. None of it really describes her, or how terribly she will be missed. I hope that wherever she is, there are lots of chickens to catch and fences to leap.