Showing posts with label pork. Show all posts

Tuesday, March 11, 2008

Again and again and again...

I usually go for variety when it comes to food. I mean, sure, I have favourites, comfort food, and a dishes that I turn to when otherwise uninspired. Every cook needs some sort of standard repertoire. But I feel somehow dissatisfied if a week's gone by and I haven't tried something new. I am definitely a creature of habit and of routine... but that routine must include something new.

The dish that I want to tell you about today defies everything I just said about variation. I could eat it for days on end, and usually do. It's something my mom made when Matt and I were back in Albuquerque over Christmas break. I ate it almost obsessively while we were there, and started recreating it the moment we got home. I've been meaning to photograph it and write down some sort of recipe or guideline ever since, but I "forgot" every time... which meant, of course, that I had the perfect excuse to make it all over.

Perhaps a week ago, I finally got my act together, took notes in the kitchen, and found my camera before we sat down to eat. These are the results:
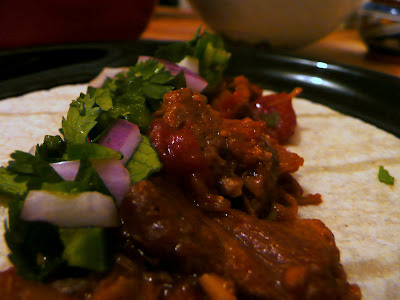

Braised Pork with Fruit and Jalapeno-Lime Salsa
adapted from my parents

The amounts for this are very approximate (I don't think I've made it the same way twice). Play around with the quantities and see how you like it best.

2 - 2 1/2 lbs pork, cut into 3-inch-ish chunks
4 large-ish cloves garlic, chopped (somewhere around the 3 tablespoon mark?)
1 medium-sized yellow onion, diced
1/2 large apple, cored, peeled and chopped
1 orange, with peel, sliced into rounds (discard the end slices)
14 oz. can diced tomatoes with juice
1 chipotle chile from a can, finely chopped
1/2 - 3/4 cup chicken broth
canola oil
salt and freshly ground pepper to taste

Preheat oven to 375 degrees.

Over medium-high heat, in a large dutch oven, heat a layer of oil. Add as much of the pork as will fit easily in a single layer on the bottom of the pan and brown on all sides. Repeat with remaining pork. Set aside, then add onion to the pan and saute until translucent and soft. Add garlic and saute until fragrant, but not brown. Add about 1/4 cup of the chicken broth to deglaze pan, then remove from heat. Reintroduce pork and any juices that have collected. Add apple, orange, tomatoes, chipotle, and as much chicken broth as needed to come about halfway up the pork mixture. Add salt and freshly ground pepper, but be gentle at this point - you can always add more later.

Cover, and bake in oven for at least three hours - four is better - or until the apple, tomato and orange pulp have melted together, and the pork is very tender. Stir every 30 minutes or so. After the first two hours, you may want to remove the oranges to separate the pulp and the zest, discarding the zest and adding the pulp back to the mixture. Alternatively, let it cook for long enough and the zest will melt into the dish as a whole. After three hours or so, take the pork out and shred it, then put it back into the oven. Taste, and adjust for salt. By the time it's done, it should practically melt in your mouth, and most of the liquid should have been absorbed - it shouldn't be at all soupy. If it is, let it cook for longer.

Serve with Jalapeno-Lime Salsa (recipe follows) and warm corn tortillas.


Jalapeno-Lime Salsa

1/2 red onion, diced
2 jalapenos (or serranos), de-seeded (optional - depends on how spicy you like it - too spicy and the pork will be overwhelmed) and finely chopped
large handful cilantro, chopped
juice of 2 limes
salt

Combine red onion, jalapenos, cilantro and lime juice in a bowl. Taste and adjust for salt.
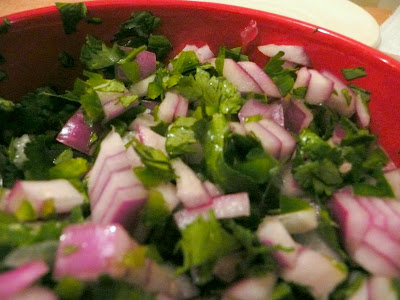


The salsa will survive for a couple of days in the fridge - it's best fresh. The pork, however, does very well as leftovers - and will last you until you buy the ingredients to start all over again.

Monday, January 7, 2008

Worth the extra work

Well, Portland has certainly welcomed us back in what I understand is true Northwest style: rain everyday since we returned on New Year's Day. We saw the sun for the first time since our vacation today. Not to sound ungrateful - it's lovely to be back. I missed our cats and our tiny, overheated apartment and the low, grey skies - the light in New Mexico is so terribly bright, so very clear. I've gotten used to the mellower richness of colours here, and gotten used to the greenery. I expect trees, now, and am no longer surprised by them. Albuquerque was so much flatter, and so much browner than I remembered it being.

That said, we sure managed to eat well while Matt and I were in town.

We had a host of places to visit, and even managed to fit in an extra visit to our beloved old
Frontier Restaurant (and reminisce about snow days and post-concert late night sweet rolls and breakfast burritos).

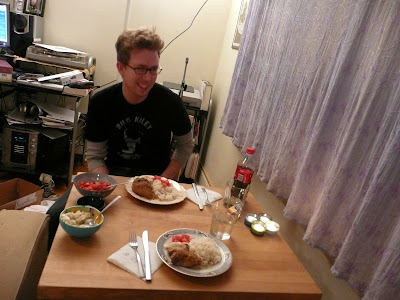
But I'm not here to rub green chile in anyone's face. I'm here to talk about some of the food we managed to turn out in my parents' kitchen: specifically New Year's Eve Dinner, here rather dramatically lit:


I'm afraid that the vast majority of our photos turned out this way - I could never be bothered to turn on any lights in the dining room to take proper shots. Now I'm paying for it.

The menu was largely from the
Zuni Cafe Cookbook (a most welcome Christmas present - Judy Rodgers is my new hero), with a dessert inspired by a recipe of Alice Medrich's. Remember those chocolate cookies awhile back? Same creator.

But dinner was as follows:
Mock Porchetta (or Tuscan Roast Pork) with roasted vegetables (fennel, onion, celeriac, parsnip, whathaveyou)
Savoury Apple Charlotte
Cream Puffs with Chocolate Grand Marnier Custard and Candied Violets

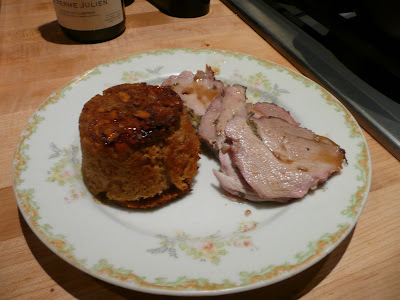
Altogether, the meal was three days in the making, and it was so utterly worth it. The pork and vegetables were lovely - delightful, in fact - an excellent roast. But the real scene-stealers were the Apple Charlotte and the Cream Puffs, which was in some ways quite gratifying, as they were, respectively, the most difficult and the easiest components. (Frustrating because now I know I'm going to have to make that Charlotte at least once a year, and god is it a nightmare. Such a tasty nightmare though, and so pretty on the plate.)

It begins, as many things do here at Itadakimasu, with apples.


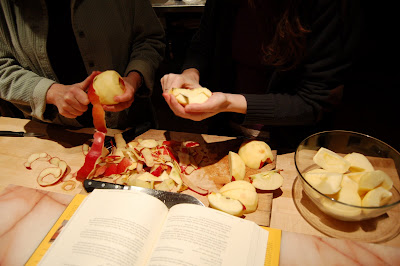
Specifically, four pounds of braeburn apples, that my mother and I peeled, cored and sliced, draped with slivers of butter and roasted until they were tender and caramelized, and the mashed into a rough apple sauce.


The next day, we cut out templates from pieces of paper, sliced bread into half-width slices and a multitude of shapes to create bread linings in 6-ounce ramekins. Think a jigsaw puzzle, with crumbly cracked-wheat and walnut breads. I was tearing my hair by the end of it.


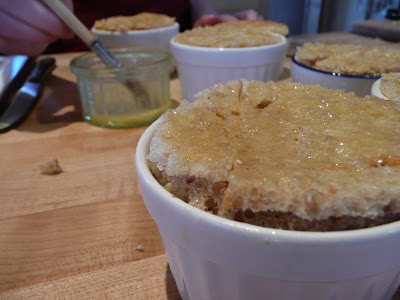
We then filled them with the apple sauce, buttered them further, and baked them until they were crisp and golden on the outside.


And then we ate them, which was probably a bad idea - because the combination of the crisp, buttery bread and the warm, sweet-but-not-too-sweet applesauce made the entire process seem very worthwhile, and entirely doable.

If you have the time and inclination to try this, you will not be disappointed. Honestly, these could go with a much simpler meat - they somewhat overshadowed the roast. More honestly, I would eat them on their own and be a very happy camper.

Roasted Applesauce & Savoury Apple Charlotte
from The Zuni Cafe Cookbook, by Judy Rodgers

For about 3 cups of applesauce:

3 1/2 - 4 pounds apples (use eating apples - Braeburns were fine, I would have preferred Pippins, because they're one of my favourites, but we were working with what we could find)
Pinch of salt
Up to 2 teaspoons sugar, as needed (I didn't use any - the apples were quite sweet on their own)
About 2 tablespoons unsalted butter
A splash of cider vinegar (highly recommended!)

Preheat the oven to 375 degrees.

Peel, core and quarter the apples. Toss with a little salt and, unless they are very sweet, a bit of sugar to taste. Spread in a shallow baking dish that crowds the apples in a single layer. Drape with slivers of butter, cover tightly and bake until the apples start to soften, 15 to 30 minutes.

Uncover, raise the heat to 500 degrees, and return the pan to the oven. Leave the apples to dry out and colour slighly, about 10 minutes. (A confession - we neglected to raise the temperature, so our apples got a much longer, slower roast - and were lovely, nonetheless. They were in the oven for nearer an hour, if I remember correctly.)

When the tips of the apples have become golden and the fruit is tender, scrape them into a bowl and stir into a chunky mash. Season with salt and sugar to taste, then consider a splash of apple cider vinegar to brighten the taste. (Yes!)

For the Charlotte, 4 servings:

4 six-ounce ramekins or custard cups

A chunk of day-old, chewy, peasant-style bread (make sure you have plenty of extra to get the right shapes!)
About 2-3 tablespoons unsalted butter, melted (err on the side of 3-4 tablespoons)
About 1 1/3 cups Roasted Applesauce (again, err on the side of more)

Preheat the oven to 350 degrees.

Slice the bread 1/8 inch thick. Avoiding the crust, cut 8 circles sized to fit the bottom of your ramekins, then cut 4 long rectangles to line the sides.(Judy Rodgers suggested partially freezing it, and I second this! Also, don't worry if you can't get whole pieces to create the shell of the charlotte - they piece together quite nicely.)

Brush the bread evenly, on one side only, with the melted butter. Line the ramekins with the bread, pressing the buttered  faces against the dishes. Set the 4 extra circles aside. Fill each ramekin with the roasted applesauce. Set the remaining bread circles, buttered side up, on top and press down lightly.

Bake until golden brown on top, about 30 minutes. To serve, slide a knife around the edge of each charlotte, then turn out onto warm plates. If the bottom circles stick to the dish, retrieve them by sliding a fork under the edges. (This wasn't an issue at all - yay for butter!)

Eat, and savour, knowing that you probably won't have these again for quite awhile, because you have to forget all about the paper templates and the partially-frozen bread before you could possibly convince yourself to go through it all again.

And don't worry, I won't make you wait too long for those cream puffs.

Wednesday, December 19, 2007

A Boy and His Adobo

Among the many, many terrible versions of Christmas carols playing on satellite radio at work, somehow a rendition of "A Few of my Favourite Things" seems to have slipped in. I've never really considered the song a carol (correct me if I'm wrong), but regardless, it served as something of an inspiration. No, not for cream-coloured ponies or schnitzel with noodles - but Pork Adobo, one of Matt's favourite dishes.


Matt had been asking for this one for a long time, and I'm honestly not quite sure why I've been putting it off. I'm not generally a lazy cook, and this was far less time consuming than I remembered it being. That said, the last time I made it, it did fall a little flat. My dad usually does a version with beef short ribs, which I prefer, but Matt wanted pork, and I figured if I was going to try it again, I might as well do it more or less right.

The original recipe is from The New York Times, and is presented with very limited tweaking. I used boneless pork ribs, mostly because they were cheaper than the whole rack of baby back, but also because I'm a recovering vegetarian, and bones in my food weird me out. So does lard, as you may remember from my last post.

Pork Ribs Adobo
adaptedish from The New York Times

1 cup apple cider vinegar, preferably organic and unfiltered
1 tablespoon soy sauce
3 small bay leaves
1 large jalapeno chile, stemmed and roughly chopped
2 lbs baby-back pork ribs, (1 side, cut into individual ribs, or boneless ribs)
2 teaspoons sea salt
6 garlic cloves, peeled
2 teaspoons black peppercorns

In a bowl, combine vinegar, soy sauce, bay leaves and chile and set aside.

Season the ribs with 1 teaspoon salt. With a mortar and pestle or a small food processor, grind the remaining teaspoon salt with the garlic and peppercorns until it forms a rough paste. Rub past into ribs and transfer to a large ziploc bag. Pour in the vinegar mixtures, seal and refrigerate for at least 1 hour or overnight, turning occasionally.

Transfer ribs and marinade to a pot, bring to a boil, reduce the heat and simmer, covered, for 1 hour, until the meat is tender. (I let mine cook for more like an hour and a half, but I like the meat all shreddy, so take your pick). Remove ribs to a baking sheet and simmer sauce until thick.

Preheat the broiler, pour 1/4 cup of the thickened sauce over the ribs, turn to coat, and broil until nicely browned, about 7 minutes, turning once.

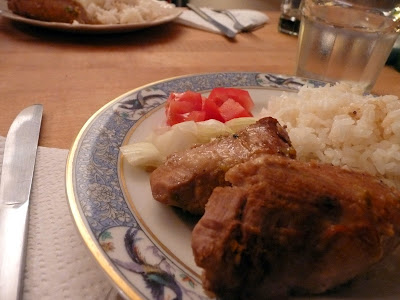
Serve over rice with the remaining sauce. Provide coarsely chopped tomato and onion to go along, if you like (it's tasty!)

And smile when you eat it - it makes the cook happy.